CD6 Manual
This manual covers the GEMS CD6 Dash Display Module: its hardware, its configuration with GEMS Dash Design, and optional custom models that run on its dedicated model processor.
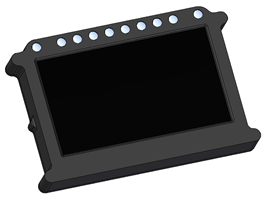
How a CD6 Is Configured
A CD6 is configured in two layers:
- Display setup (every CD6). You create it in GEMS Dash Design. It defines channels, CAN messages, screens, alarms, LEDs, logging and outputs. Uploading it programs the display. No coding is needed.
- Custom model (optional). Your own Simulink®-generated or C application, built with the CDX Model Runtime. It runs on the CD6’s Cortex-M4 at a fixed rate, alongside the display firmware. It receives dash channel values and returns results as new channels. See Custom Models (CDX).
Where To Start
| To… | Read |
|---|---|
| Check specifications or wire the connector | CD6 Hardware |
| Install Dash Design, create screens, configure CAN or update firmware | Configuring with Dash Design |
| Find out what custom models are for | Custom Models (CDX) |
| Build a first model and run it on a CD6 | Quickstart: Hello World |
| Bring a Simulink model to the CD6 | Simulink Projects |
| Look up a CDX function | CDX Runtime API Reference |
Manual Contents
- CD6 Hardware: CD6-43 and CD6-50 specifications and connector pinout.
- Configuring with Dash Design: installing Dash Design, building and uploading setups, firmware updates and adding a model to a setup, with links to the Dash Design manual.
- Custom Models (CDX): what models are for, the hello-world quickstart, tools, examples, model integration, Simulink projects, the CDX CLI and runtime updates.
- CDX Runtime API Reference: declarations, types, parameters and failure results for the public CDX headers.
Scope
The hardware pages are based on GEMS CD6 Technical Specification 105497,
Revision 3. The CDX Runtime API Reference
documents the headers in the runtime’s include folder. The
Dash Design manual is the authoritative
reference for setup editing.